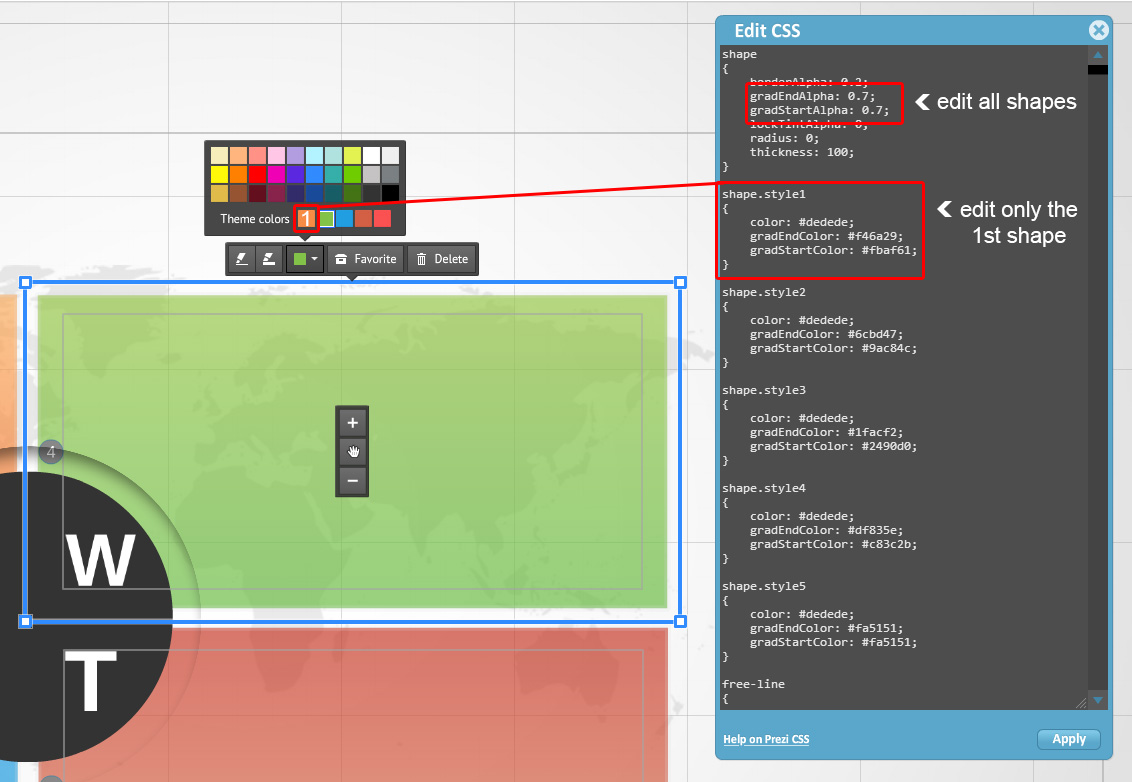
While it is not possible to make images transparent in Prezi, then with the basic shapes like circle, rectangle and triangle, it is a whole nother story. The basic shapes are very customizable: you can make them in any size, color and even add a transparency or color gradient, for example a rectangle with red and black gradient and red color being transparent.
Here’s how:
You can control the color of a prezi shape simply by clicking on it and choosing a color, but to add a transparency option, you need to open the CSS editor.
1) Click on the Customize button on the top center of the Screen.
2) In the right sidebar scroll to the bottom and click Advanced.
3) In the popup menu click Use the Prezi CSS editor
In the new CSS window there are a lot of options to change the entire Prezi, however for changing the transparency (or opacity) you will need to scroll down to the shapes area. The shape options in the CSS define all the shapes together (circle, triangle, rectangle) and there are placeholders for 5 different shapes. When you click on a shape in your Prezi then those are listed as Theme shapes and in the CSS you will also see the main shapes category and 5 more below it. This means you can customize 5 different shapes in your Prezi, all with different colors and transparency levels.
The transparency is controlled by the commands gradEndAlpha and gradStartAlpha. If you want to make your shape equally transparent 50%, then you would change the value of both of these to 0.5 (use point cot comma). To add add a gradient you can simply make one value smaller. NB: After making the changes, don’t forget to click the Apply button.
