
Have you ever wanted to download images or videos from your Prezi onto your computer?
Since the launch of Prezi, it has always been quite difficult to download of the original images or videos that you’ve already inserted into your presentation.
However with the launch of Prezi Next, extracting and download images (or videos) from your own or even someone else’s presentation is quite simple.
In fact I don’t think it can get any easier than this!
However there are various options, as it largely depends on whether you need all images, a single image, video or even content from someone else’s Prezi.
So let’s look at all the different options for downloading content from a Prezi and see which one is suitable for you:
Method 1 – Download All Content (images + videos) from Your Own Prezi
This first method is great if you need to download all the images and videos from your own Prezi.
It also works for both Prezi Classic and Prezi Next presentations (they both have separate Desktop App, or you can also convert your Prezi Classic to Prezi Next and use the method below.)
NB: If you only need to download 1 or a few images, then consider using the second method, as that is much faster!
But if you need all the content, then do it like this:
1) Open the Prezi Desktop App (example created in Prezi Next and Windows operating system)
2) Find your presentation and export it as a Portable Prezi
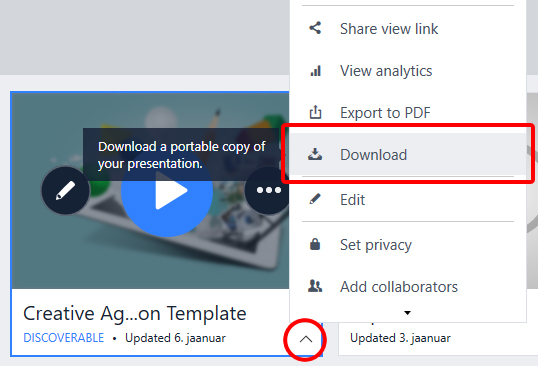
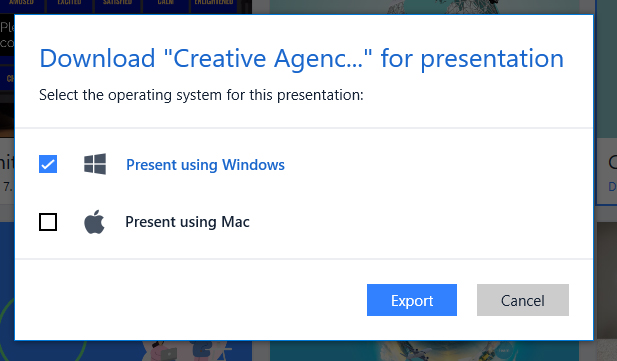
3) Find the .exe file you just exported, right-click on the file and choose “Extract to “Prezi WIN YOUR_PREZI_NAME
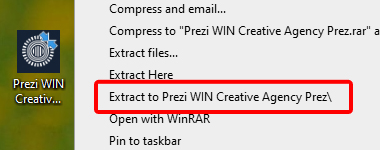
This will create a new folder with all the Prezi content inside.
4) Inside that new folder, navigate to \contents.portable\images

5) and voila! Absolutely all the media content from your Prezi is listed in this folder:
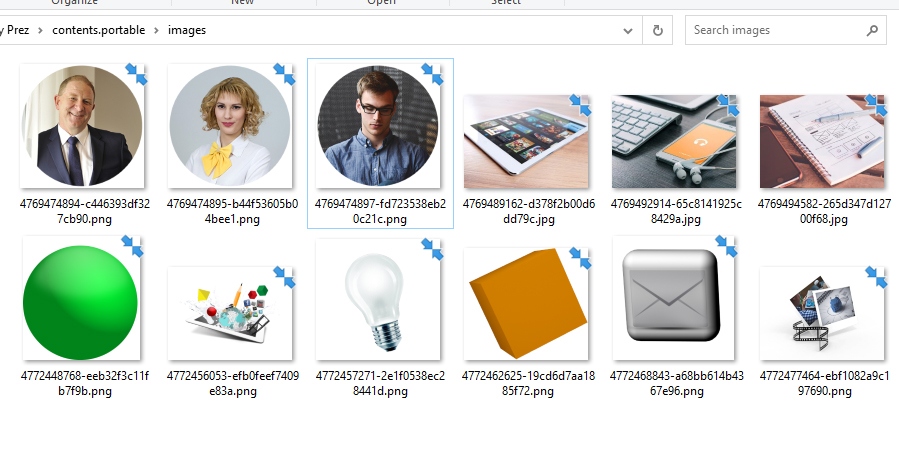
Method 2 – Download Images One-by-One from an Online Prezi Presentation (Also Works if The Prezi is Not Yours)
(if your Prezi is private, you should use the method described in the previous section with Prezi Desktop)
If your Prezi is public, do it like this:
1) Go to the public URL of your Prezi like this: https://prezi.com/p/bt3mljrsxrgf/
You might want to log-out if you are viewing your own Prezi (because it will open in edit view, instead of presentation view which we need), or use the incognito tab.
2) On the new Prezi URL, there is also an Outline section, where all slides are shown as static images.
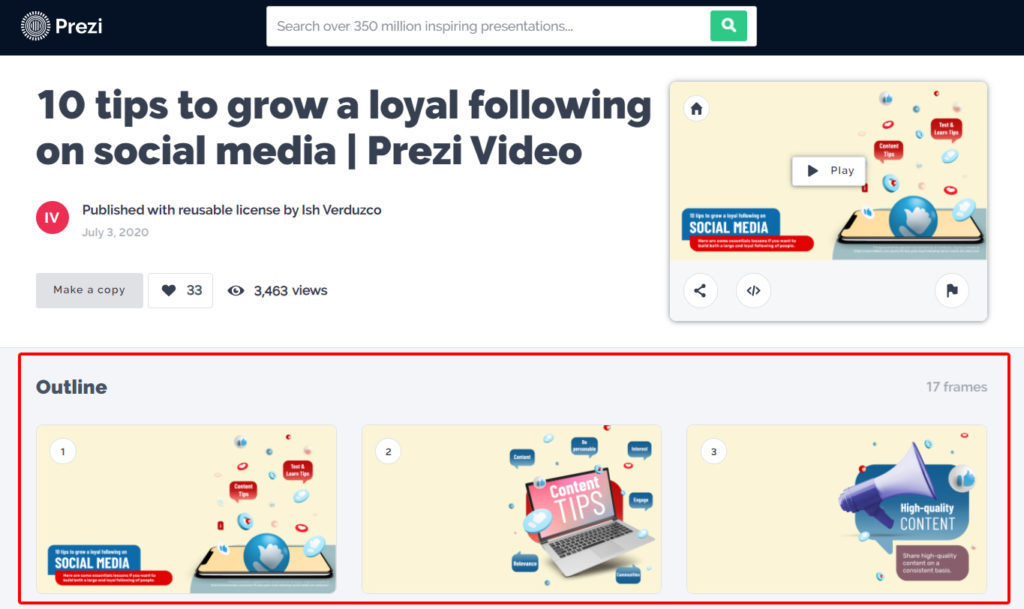
Simply scroll down and find a slide which includes the images(s) you are looking for.
3) You’ll be taken to a new page which includes the overview of the slide…
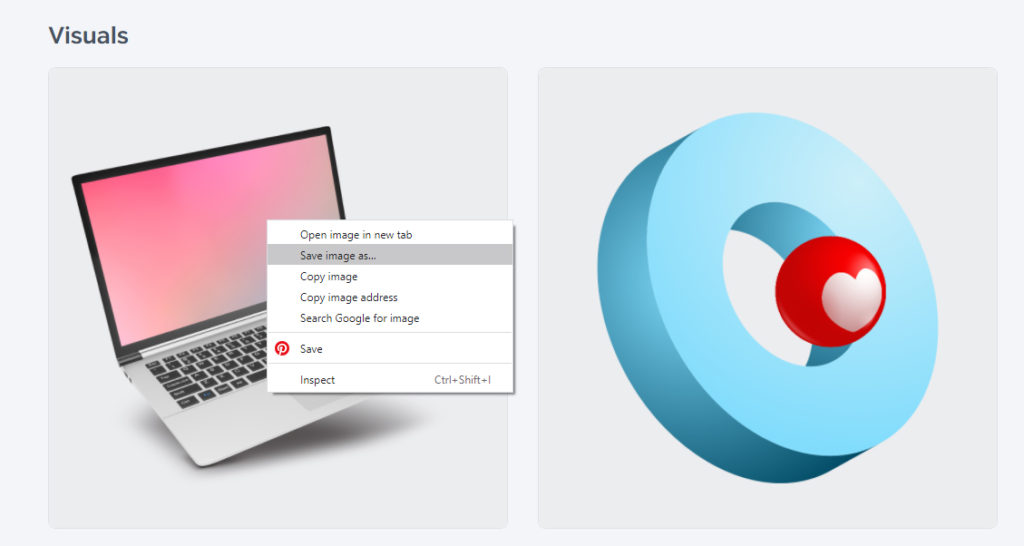
however when you scroll down further, you’ll also see the section named “Visuals” with all the images used on that slide in full size.
Right click on the image you need, and depending on your web browser, you’ll an option to download the original image like this (Chrome)
Download Just the Background Image of Your Online Prezi (Inside the Edit Mode – for Advanced Users)
Sometimes you just might want to download the original full-size background image of your Prezi presentation.
You can use both of the above methods for achieving this, however this trick is for the lazy people, because there is no need to leave the edit mode of your Prezi…
Do it like this:
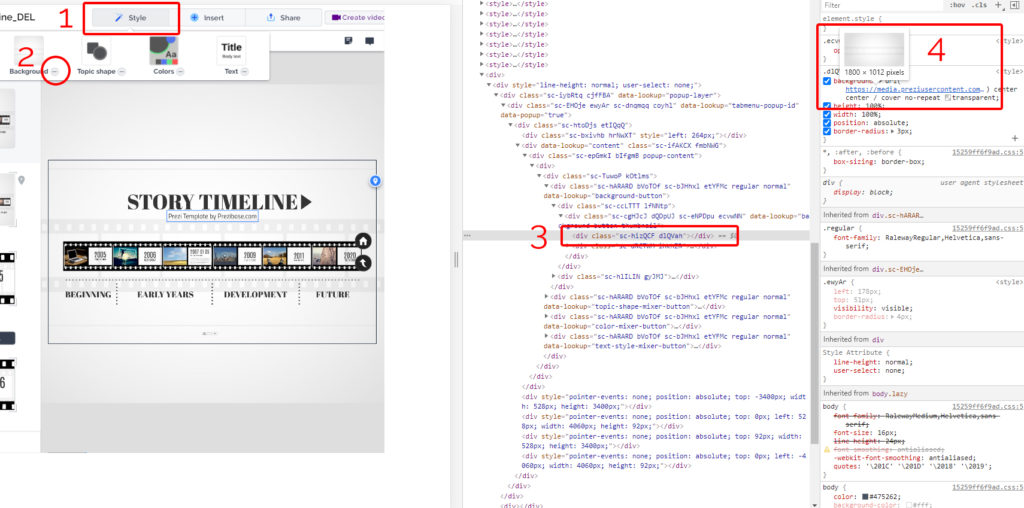
1) inside your Prezi edit mode, click on Style menu
2) hover over the Background area and make a right-click
3) then choose “Inspect” (In Chrome – might be different in other browsers)
4) Click on the DIV with the class= sc-hizQCF dlQVah
5) This will reveal the URL to the full background image, which you can insert into the address bar and download your image in full size:
Conclusion
That was it – 3 methods for downloading the original images from your Prezi.
If you wish to save a quick screenshot from your Prezi from any slide, you can also use a method described in this blog post.
I hope this tutorial was helpful, but if you need help with downloading images, don’t hesitate to share your ideas or questions in the comments.

Too many thanks!!!!