Saving a screenshot from a Prezi Next presentation is a very simple and straightforward process. The described method works on Google Chrome web browsers without any third-party software and saves your image as a PNG file.
- First go into the Edit or Presentation mode of your presentation, or simply copy the URL of your Prezi into the browser address bar;
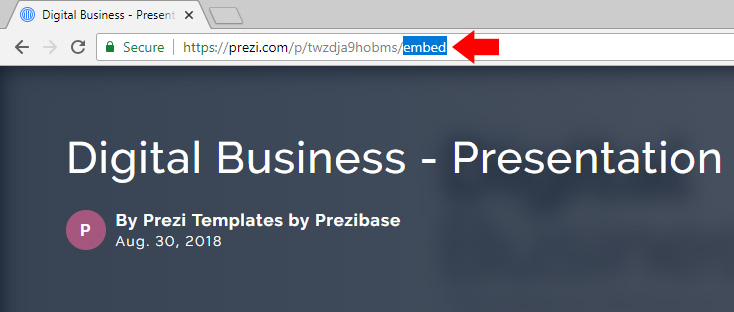
- Type embed at the end of the URL and press enter as highlighted on the image above;
- Wait for the Prezi to load and click play.
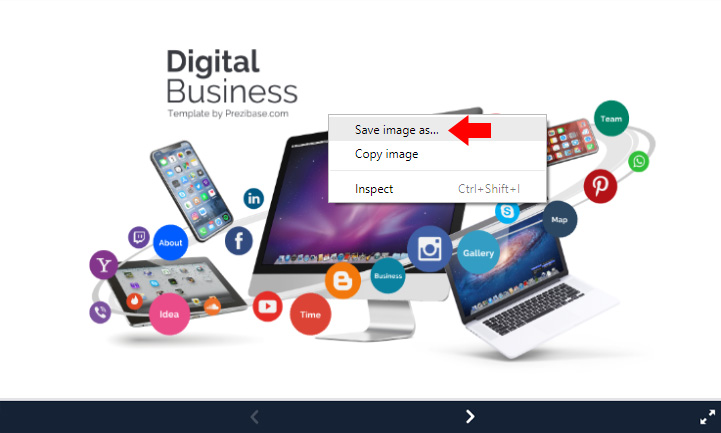
- Right-click anywhere in the Prezi, and a menu with an option “Save image as…” will appear.
This process will allow you to save the overview or any other slide within the presentation as an uncompressed and full size PNG file and it only works in the embed view! The downside is that because the process uses the HTML canvas feature, it saves the entire canvas size, which might include some black areas on the sides. For better control over a screenshot size and easier cropping, you can also use the Snipping Tool, which is built into Windows 10.